As an administrator, you can manage users, roles, and permission from the advanced event mesh console or using the advanced event mesh REST API. For more information about using the REST API, see Managing Users with the SAP Integration Suite, Advanced Event Mesh REST API.
For overview information about user management, see Managing Users, Roles, and Permissions.
Configuring User Settings
You can manage users, roles, and permissions for your advanced event mesh account by performing these tasks:
Adding a User
To add a user to an account, perform these steps:
-
Log in to the Cloud Console if you have not done so yet. The URL to access the Cloud Console differs based on your authentication scheme. For more information, see
- On the navigation bar, click User & Account
 and then select Account Details.
 - On the Account Details page, select the User Management tab, and click Invite.
- In the Invite User dialog, fill the Email Address field.
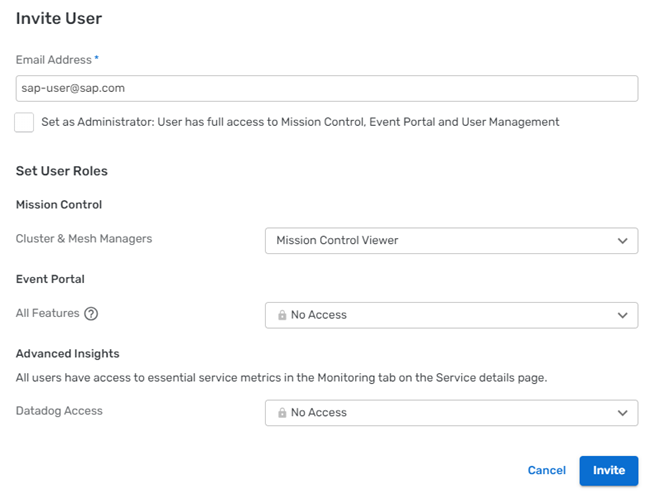
- Optionally, you can change the default User Roles setting. For more information, see Changing User Roles.
- Click Invite.
After you add the user, the user receives a confirmation email with an account activation link.
Have users check their spam folders or junk mail to ensure that the invitation email has not been filtered.
Resending an Activation Email
After you add a new user to an account, the account status remains pending until the user clicks the account activation link in the email message. You can resend the account activation email as a reminder.
To resend an account activation email, perform these steps:
- On the navigation bar, click User & Account and then select Account Details.
- On the Account Details page, select the User Management tab.
- Find the user that want resend the invitation to. Optionally, you can type in the Search Emails field to filter the user accounts that are visible.
- For the user, click User Actions
 , and then select Re-send Invite. Note that the option to resend the invite appears only if the user hasn't accepted an invitation to log into advanced event mesh.
If you have Insights, you can re-send the Datadog invite separately. For more information, see Resending an Invitation Email from Datadog.
Changing User Roles
As an account administrator, you can change the role of any existing user; however, you can't remove the administrator role from yourself nor delete yourself
To edit the roles and permissions of a user, perform the following steps:
- On the navigation bar, click User & Account and then select Account Details.
- On the Account Details page, select the User Management tab.
- In the list of users, find the user whose roles you want to change. Optionally, you can filter the list based on role or use the search to quickly find user accounts that are visible.
-
For the user, click User Actions
 , and then select Edit.
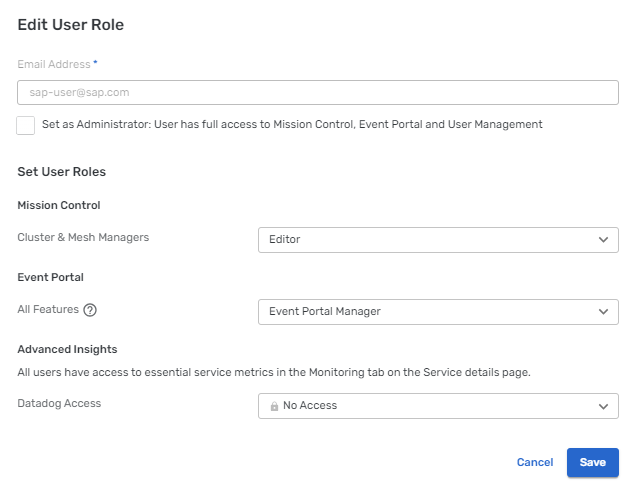
- Update the roles and permission as required, and then click Save.
The user is immediately updated with the roles and permissions you specified. Note that if you add or remove the Insights Advanced Editor role, the following occurs:
- When you add the role, a Datadog account is created for the user and an invitation is sent to them. For more information, see Configuring an Existing User to Access Datadog.
- When you remove the role, the Datadog account is deactivated. For more information, see Removing Datadog Access for a User.
Deleting a User
As an account administrator, you can delete any user from an account except yourself.
If the user you delete has the Insights Advanced Editor role assigned, the corresponding Datadog account is disabled.
If the user owns any event broker services, reassign them to yourself or another user before you delete the user.
To delete a user from an account, perform the following steps:
- On the navigation bar, click User & Accounts and then select Account Details.
- On the Account Details page, select the User Management tab.
- Identify the user that you to want to delete from your advanced event mesh account. Optionally, you can filter the list based on role or use the search to quickly find user accounts that are visible.
- For the user, click User Actions , and then select Delete
- Verify that email address matches the user you want to delete, and click Confirm.